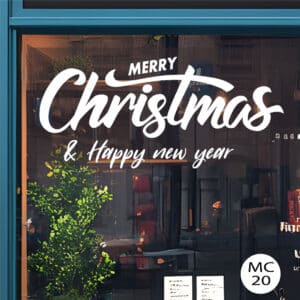

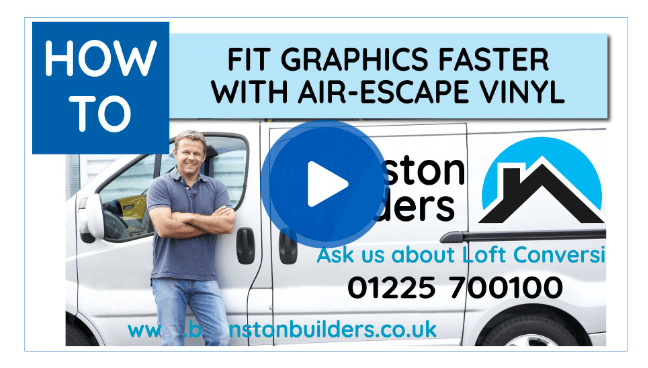
Video – Fitting your van graphics
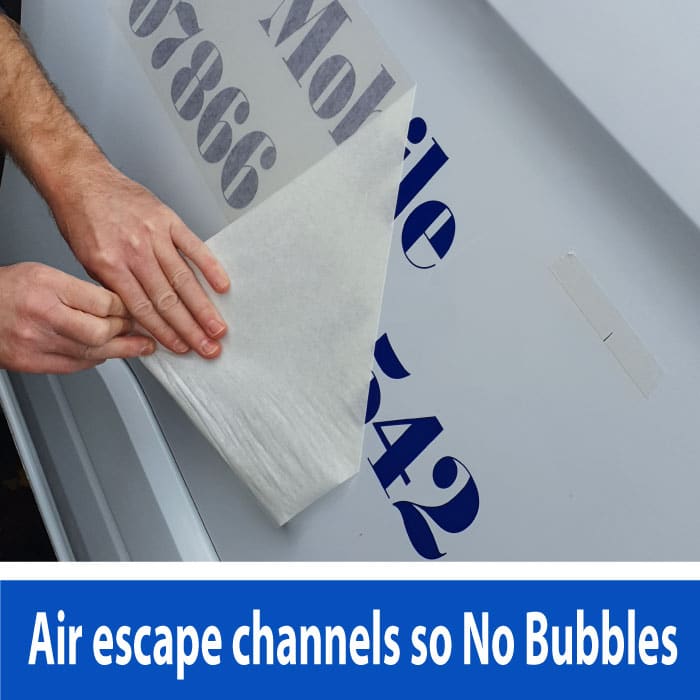
Air-Escape Vinyl
Air escape vinyl has a significant advantage in preventing air pockets from forming during installation. This is made possible by the microscopic air channels in the adhesive backing, which allow air to escape during installation. The vinyl film can be applied smoothly and evenly without any special tools or expertise.
The air channels also reduce the initial grab of the adhesive, making it easier to reposition your graphics until they are in the perfect position.
Check out our short video below.
The video demonstrates our recommended method for applying vinyl lettering or stickers. It emphasizes the importance of having an extra pair of hands.
The Factory Fitting Option
It's a shame to choose our Factory fitting service because you lose out on the thrill you will get when you will get every time you see your van knowing that it is totally your creation but there are circumstances where it may be the best option.
Reason 1 - You have no suitable location for doing your fitting so it is factory fit or nothing.
Reason 2 - You are too busy or not into trying something new - You would rather drop the van off & pick it up later.
Reason 3 - You would like us to fit while you watch so that next time you will be trained & ready to do it yourself
Reason 4 - You like our hospitality option - Arrive - We take you to the local Cafe (100 yds). We treat you to their All Day Breakfast. While you are enjoying your breakfast we fit your graphics. Then, after breakfast, you are ready to go.
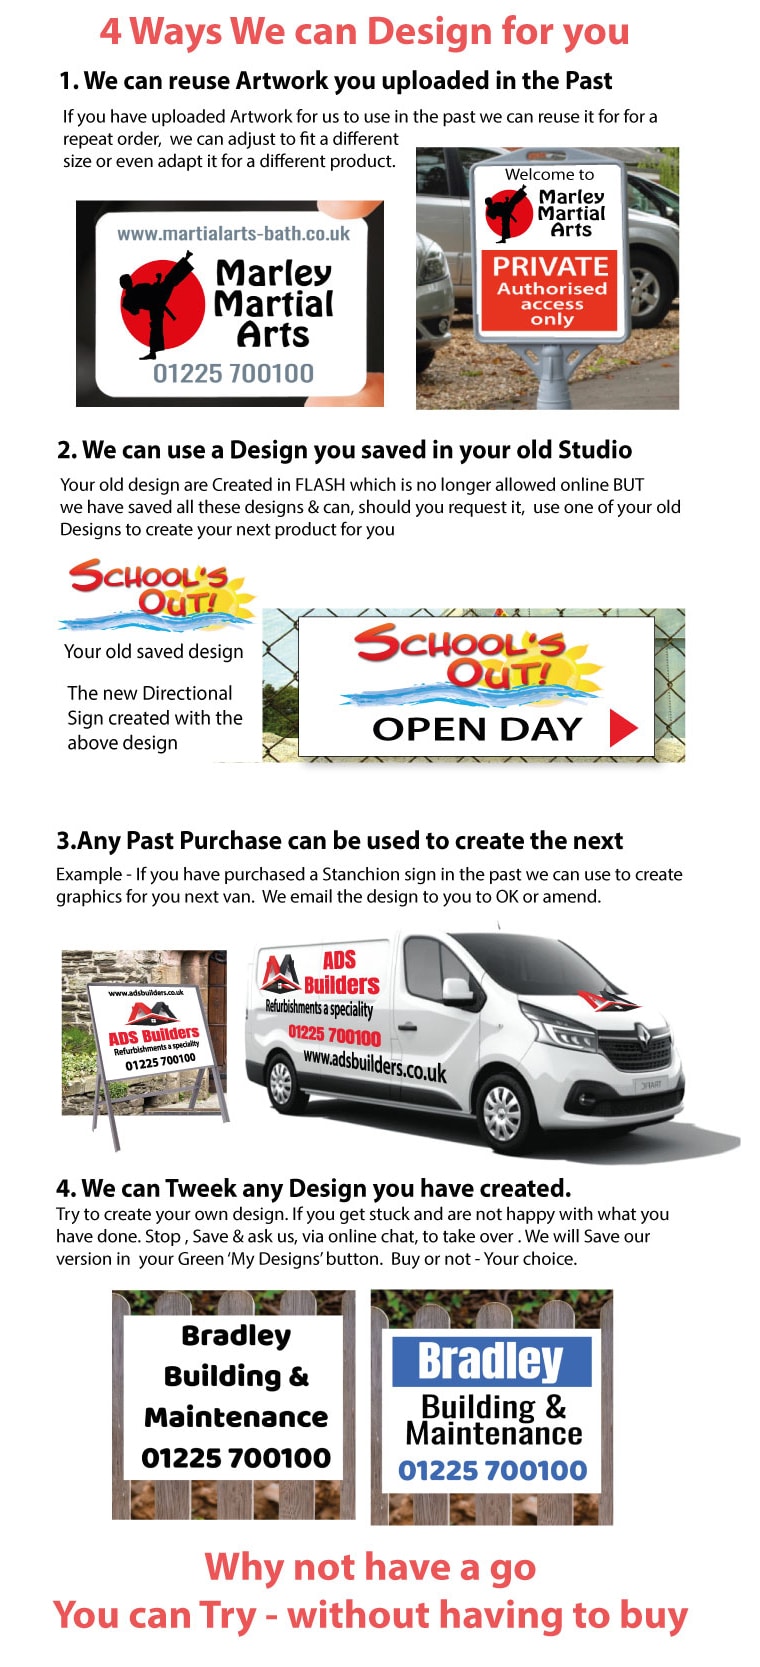
Designing on a Template of Your Van – 10 Tips & Tricks
Our Van Online Design area is lots of fun to use & quite addictive. We hope the 10 tips featured in the 5 steps below will get you going fast.
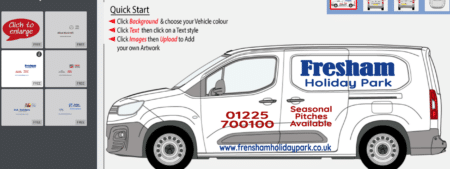
Step 1- In the Design Area - Choose a template
You have 5 templates to choose from - Click one to view on your van. Visualise how each template will look when you click & change to your information. Choose your favourite
The Videos in the section below show you how to select a design, change to your message, change colour, adjust the size, choose a different font & much more but, if you get stuck, click the chat button - we are pleased to help
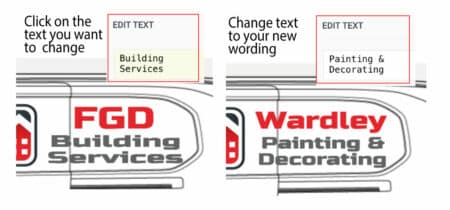
Step 2 - Click & Change to your information
Click & Change to your message
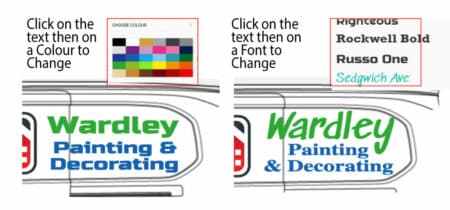
Change your Colours. Change your font
Step 3 - Add or Change a Logo

 Upload your own Logo or use one of ours
To upload your own logos (or Photos) click the "Your Images" tab in the design area on the left-hand side & upload your logo. Your images will pop up next to the "Your Images" button ready to use
To use one of our logos click the "Clipart" button & search for a logo or Picture.
If you cannot find what you want then click the chat button. Tell us what you are looking for & we will find something to match your needs.
Changing or adding your Logo to the Van Design
Click on the logo that you want to change. 4 handles pop up around the logo so you know it is selected then click on the replacement logo. It will automatically replace the original logo scaled to match the original size.
![]()
Step 4 - Try Different Options
Save Your Design then experiment
First ideas are not always the best so now is the time to try different layouts, colours, fonts even different images but before you start save your current design so that you can come back to it if your experiments are not successful. Save each interesting variation you create & choose the best later. Save by clicking the Red "SAVE" button. View your Saved designs by clicking the green " MY DESIGNS" button

We have also circled 2 other buttons that sometimes go unnoticed. The undo button & the add to basket button. The undo button is useful when you delete something unintentionally.
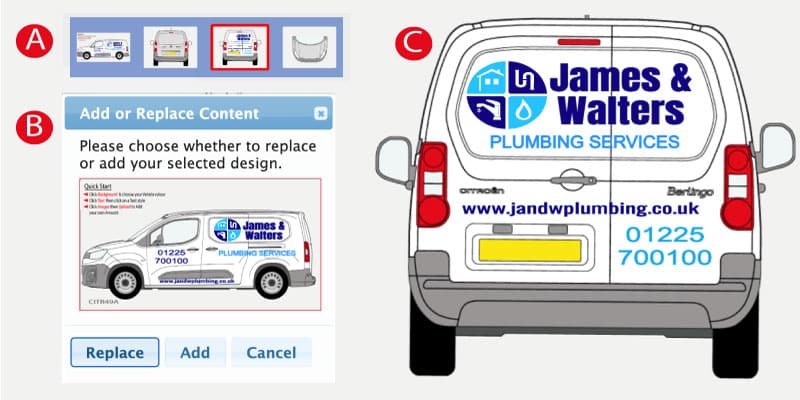
Save & use on the back of the van
Having created the side design to your satisfaction & saved it. You can now go to the back of the vanby clicking your type of back design (see A). Go to the Gree "My Designs" & click the design you want to download then click "Add" (see B). Your saved design will download onto the rear of the van. Adjust sizes t& positions to create your rear design (See C)
Step 5 - Use your Design on future jobs
Our Magic Save Button
Our SAVE button has a unique feature - it saves only your design, not the product you designed it on. This means that you can choose a saved design and add it to any product. With just a few minutes of repositioning and resizing, you can create a new design for a different product.
Designing – 6 ways we can help
The Chat Button
Clicking Chat is a fast way to get help on any aspect of design. Our chat button is answered by a person not an AI robot. Questions like "Can't work out how to change colour", and "How do I upload my Logo" can be answered easily & quickly.
Questions like "I am not happy with my design. Any suggestions on how to improve it" need more in-depth action by us (see below) but the Chat button is a quick way to get more in-depth action organised
Tweek My Design
In the design area, we have a RED "Save" button. At any stage, you can save your design. The Design is saved in the GREEN "My Designs" area. Click the GREEN "My Designs" button to view all your saved designs & to ask us to tweak one of your designs. Our tweaked design is saved in the GREEN box for you to view.
Learn by Co-Browsing
When you are in our design area there is a hidden button that you can press this allows us to see our our design area on your computer. Unlike screen-sharing, we can only see our website. We can guide you step by step through any part of the process of creating a sign including how to use saved designs on your next project. Use the chat button to book a one-to-one training session.
The "We Design for You" Option
We are pleased to offer this service but we would rather help you design yourself because we know what pleasure you will get when you see you own signage on display. We will enjoy designing your signs for you but we would rather support you in any way you need to enjoy designing then seeing your own signs in action.
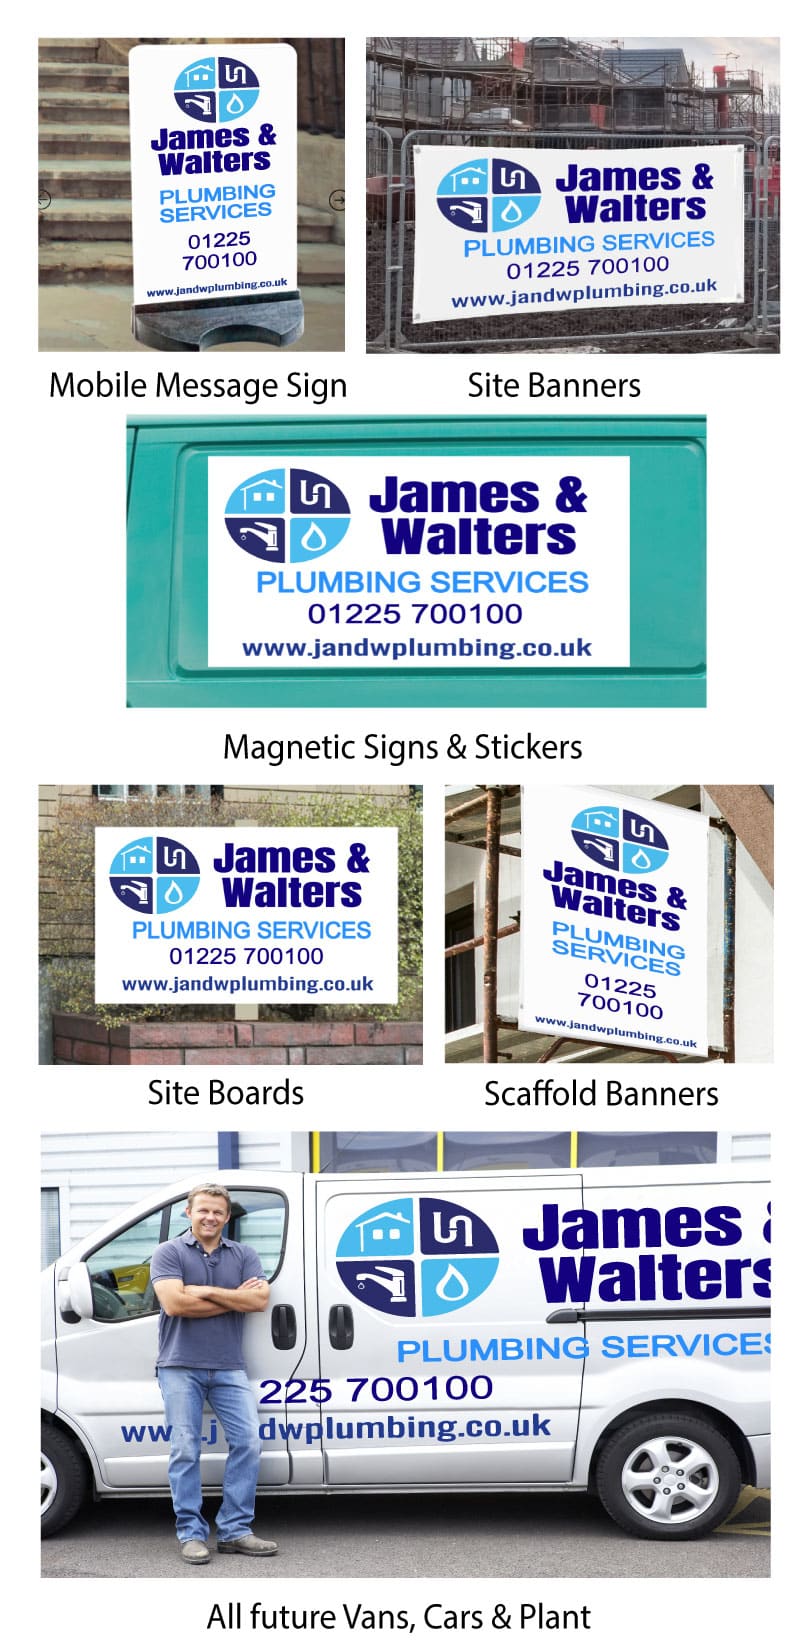
Customer Photo Reviews, Tips & Tricks
A good source for inspiration is our Customers Photo Review section. Here you will see what other customers have done. Take advantage of their tips & tricks. Note also that these signs each say what the customer wanted saying not what someone else said was a good idea. We hope, in the near future, it is your photos we are looking at with your tips & tricks helping another new customer have the confidence to give it a go
Step by step Videos
We have a "How to" video section that will answer most queries (Click here to View). You can also click the chat button - we are pleased to help.